

Indulge in the festive spirit with these exquisite, buttery gluten-free sugar cookies, beautifully crowned with a sweet, creamy peppermint buttercream frosting.

The Ultimate Guide to Baking Irresistible Gluten-Free Peppermint Sugar Cookies
Welcome, fellow bakers and sweet tooth enthusiasts, to a truly special treat! If you’ve been searching for the perfect holiday cookie that caters to everyone, especially those with gluten sensitivities, then your quest ends here. Today, we’re diving into a recipe that promises pure joy: the most delightful gluten-free sugar cookies paired with a dreamy, melt-in-your-mouth peppermint buttercream. This isn’t just a recipe; it’s an invitation to create festive memories and savor every buttery, minty bite.

For all my gluten-free friends, this recipe is crafted specifically with you in mind. But here’s the best part: whether you follow a gluten-free diet or not, these sensational cookies will fool even the most discerning palates. Forget any preconceived notions about gluten-free baking being a compromise; these taste indistinguishable from traditional sugar cookies, if not better! Each cookie boasts a perfect balance of buttery richness and a gentle crunch, infused with a hint of classic vanilla. And what’s a sugar cookie without a luxurious topping? We’re elevating these beauties with a thick, velvety peppermint buttercream, a frosting that effortlessly transforms any dessert into a masterpiece of flavor and texture.
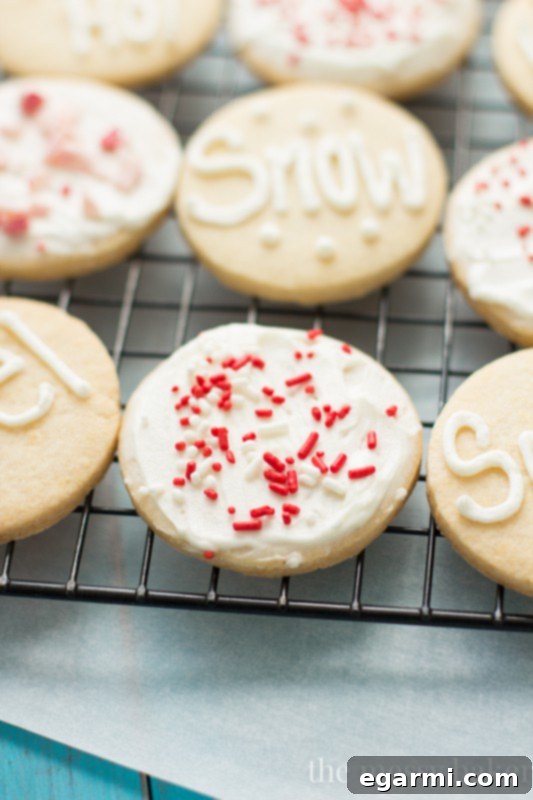
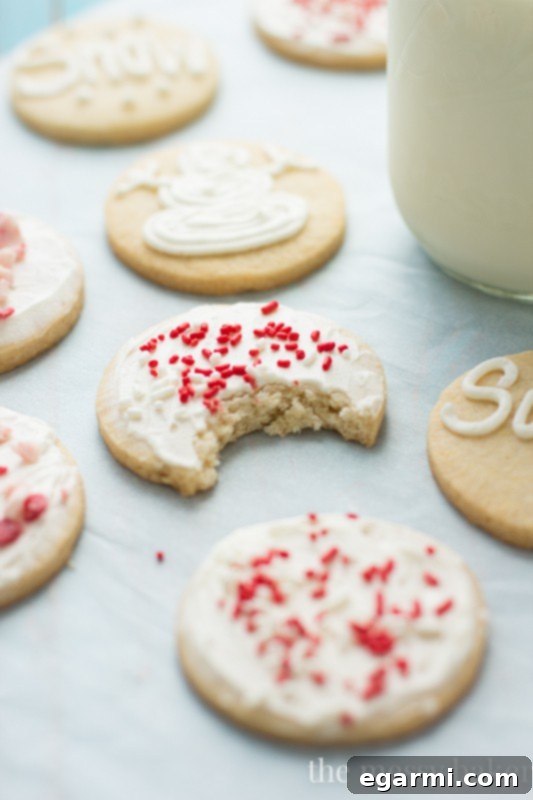
The Secret to Effortless Gluten-Free Baking: Pamela’s Products Sugar Cookie Mix
Achieving truly exceptional gluten-free sugar cookies doesn’t have to be complicated. For this recipe, we’ve discovered a fantastic shortcut that guarantees success every time: Pamela’s Products Sugar Cookie Mix. This isn’t just any mix; it’s a game-changer for gluten-free baking, making the entire process incredibly simple and enjoyable. The beauty of this mix lies in its simplicity. You only need a few staple ingredients to bring the dough to life: the mix itself, one stick of softened unsalted butter, a single egg, and a teaspoon of pure vanilla extract for that classic flavor boost. Just combine these ingredients in your mixing bowl – whether you’re using a handheld mixer or the convenience of a stand mixer – and beat until a cohesive, smooth dough ball forms. From there, it’s a straightforward sequence: wrap and chill, roll and cut, bake, frost, and finally, indulge!
Pamela’s Products lives by a motto that truly resonates with home bakers: “No crumbles, no cracks. Just roll and cut.” This promise is not an exaggeration. We’ve put it to the test, and the results are consistently outstanding. The dough comes together effortlessly, yielding a beautifully smooth texture that’s a joy to work with. It rolls out like a dream, allowing you to create perfectly shaped cookies without any frustrating tears or stickiness. And the baking performance? Absolutely flawless. These cookies hold their shape magnificently in the oven, emerging perfectly baked with no unwanted spreading, crumbling, or cracking.

The taste is genuinely remarkable. If you didn’t know these were gluten-free, you’d simply assume they were classic, perfectly crafted sugar cookies. This recipe truly defies expectations, proving that gluten-free baking can be every bit as delicious and satisfying as its traditional counterparts. Prepare to impress everyone with these delightful treats!

Mastering Your Gluten-Free Sugar Cookies: Essential Tips for Success
To ensure your gluten-free sugar cookies turn out flawlessly every single time, follow these expert tips. Each step is crucial for achieving that perfect texture and shape:
- Chill Your Dough Thoroughly: This is arguably the most critical step for perfect cut-out cookies. After preparing your dough, wrap it tightly in plastic wrap and refrigerate it for a minimum of 4 hours, or ideally, overnight. Chilling allows the butter to firm up, preventing the cookies from spreading excessively in the oven and ensuring they maintain their crisp, buttery texture. Skipping this step can lead to thin, misshapen cookies.
- Prepare Your Baking Environment: Before you begin rolling, preheat your oven to 350 degrees F (175 degrees C). Line two baking sheets with parchment paper or a silicone baking mat. While parchment paper works well, silicone mats are often preferred for sugar cookies as they offer superior non-stick properties and promote even browning without the risk of scorching.
- Soften Dough Slightly Before Rolling: Don’t try to roll rock-hard dough straight from the fridge. Remove the chilled dough from the refrigerator about 15 minutes before you plan to roll it. This short resting period allows the dough to soften just enough to become more pliable and manageable, making it easier to roll without cracking.
- Form a Thick Disc: Instead of trying to roll a round ball, gently press the dough ball into a thick, flat disc using the warmth of your hands. This initial flattening makes the rolling process smoother and more even, helping you achieve uniform thickness.
- Lightly Flour Your Work Surface: A gentle sprinkle of gluten-free flour on your work surface is all you need to prevent sticking. Too much flour can dry out the dough, so use a light hand. Similarly, lightly dust your rolling pin.
- Achieve Uniform Thickness: Using a rolling pin, roll the dough until it is consistently about 1/8-inch thick. Uniform thickness is key for even baking; thinner parts will crisp too quickly, while thicker parts might remain undercooked.
- Cut and Re-Roll Smartly: Use your favorite cookie cutters to create festive shapes. Arrange them as close as possible on the rolled-out dough to minimize scraps. Gather the leftover dough, gently knead it back into a ball, and repeat steps 5, 6, and 7 until all the dough is used. If at any point the dough becomes too warm or sticky to manage, simply wrap it in plastic wrap and place it back in the refrigerator for a few minutes to re-chill.
- Proper Spacing on Baking Sheets: Place your cut-out shapes onto the prepared baking sheets, ensuring about 1-inch of space between each cookie. This allows for proper air circulation and prevents them from baking into each other if there’s any slight spread.
- The Freezer Trick for Perfect Shapes: For cookies that truly hold their intricate shapes, I highly recommend placing the entire baking sheet with the cut-out cookies into the freezer for 10 minutes prior to baking. This quick chill sets the butter even more firmly, acting as an insurance policy against spreading. Your snowmen will come out looking exactly like snowmen!
- Bake Evenly: Bake for 12-14 minutes, depending on your oven and the thickness of your cookies. Midway through baking (around the 6-7 minute mark), rotate the baking sheet 180 degrees. This promotes even baking and browning across all cookies.
- Cool Completely Before Frosting: Once baked, allow your cookies to cool on the baking sheet for 10 minutes. They are delicate when hot. Then, carefully transfer them to a wire rack to cool completely. This step is non-negotiable! Attempting to frost warm cookies will lead to a melty, messy disaster.
- Embrace Creativity with Frosting: Once fully cooled, it’s time for the fun part! Frost your cookies generously with the peppermint buttercream. Don’t be afraid to get creative with your frosting techniques. Swirls, smooth layers, or even intricate designs – the possibilities are endless. And of course, a dazzling array of sprinkles (or crushed candy canes for an extra peppermint kick!) are an absolute must for that festive finish!

These peppermint-frosted gluten-free sugar cookies are a triumph of flavor and texture. They strike the perfect balance between buttery richness and sweet, refreshing peppermint, all encapsulated in a cookie with just the right amount of delightful crunch. They are guaranteed to be a hit at any gathering, charming both friends and family with their irresistible taste and festive appeal. Prepare for rave reviews and requests for the recipe!

Gluten-Free Sugar Cookies with Peppermint Buttercream
Experience the joy of baking and indulging in these heavenly gluten-free sugar cookies, perfectly crispy and adorned with a delightful, creamy peppermint buttercream frosting. A festive treat for any occasion!
Yield: 25-30 cookies
Total Time: 4 hours 18 minutes
Prep Time: 4 hours 5 minutes
Cook Time: 13 minutes
Ingredients:
For the Gluten-Free Sugar Cookies:
- 1 package Pamela’s Products Sugar Cookie Mix (your secret weapon for perfect gluten-free dough!)
- 1 stick (1/2 cup) unsalted butter, softened to room temperature
- 1 large egg
- 1 teaspoon pure vanilla extract
For the Creamy Peppermint Buttercream:
- 1 stick (1/2 cup) unsalted butter, softened to room temperature
- 1 and 1/2 cups powdered sugar (confectioners’ sugar), sifted to avoid lumps
- 2 tablespoons heavy cream (or milk for a slightly lighter consistency)
- 1/4 teaspoon pure peppermint extract (adjust to your taste for intensity)
Directions:
For the Gluten-Free Sugar Cookies:
- In a large mixing bowl, using either a handheld electric mixer or a stand mixer fitted with the paddle attachment, combine the entire contents of the Pamela’s sugar cookie package with the softened butter. Beat on low speed until the mixture resembles coarse, sandy crumbs.
- Add the large egg and vanilla extract to the bowl. Increase the mixer speed to medium and beat until the dough comes together beautifully, forming a cohesive ball. Be careful not to overmix.
- Gently flatten the dough ball into a disc and wrap it tightly in plastic wrap. Transfer the wrapped dough to the refrigerator and chill for a minimum of 4 hours, or preferably overnight. This crucial step prevents spreading during baking.
- Approximately 15 minutes before you plan to bake, remove the chilled dough from the refrigerator to allow it to soften slightly, making it easier to roll. While the dough rests, preheat your oven to 350 degrees F (175 degrees C) and line two large baking sheets with parchment paper or silicone baking mats.
- Lightly flour your clean work surface (using gluten-free flour). Place the dough disc on the floured surface and, using a rolling pin, roll it out evenly to about 1/8-inch thickness.
- Using your favorite cookie cutters, cut the dough into desired shapes. Carefully transfer the cut-out cookies to your prepared baking sheets, leaving about 1 inch of space between each one. Reroll any dough scraps, repeating the cutting process until all the dough is used. If the dough becomes too warm or difficult to handle, refrigerate it briefly.
- For perfectly defined cookies that maintain their shape, place the baking sheets with the cut-out dough into the refrigerator or freezer for 10 minutes before baking.
- Bake the cookies for 10-12 minutes, or until the edges are lightly golden and the tops are set. For even baking, rotate the baking sheets halfway through the baking time.
- Allow the baked cookies to cool on the baking sheets for 5-10 minutes. They are delicate when warm. Then, carefully transfer them to a wire rack to cool completely before frosting. This is essential for the frosting to adhere properly.
For the Creamy Peppermint Buttercream:
- In a large bowl, using a handheld mixer or the whisk attachment of a stand mixer, cream the softened unsalted butter until light and fluffy, about 1-2 minutes.
- Gradually add the sifted powdered sugar, beating on low speed until fully incorporated, then increase speed to medium-high and beat until smooth and creamy, about 2-3 minutes.
- Pour in the heavy cream and peppermint extract. Whip on high speed for another 1-2 minutes until the buttercream is beautifully light, airy, and fluffy.
- Once the cookies are completely cool, frost them as desired. You can use a small offset spatula for a rustic spread, a piping bag with a round tip for intricate designs or lettering, or even dip the tops! Feel free to decorate with festive sprinkles, crushed candy canes, or a dusting of extra powdered sugar for an irresistible finish.
All images and text ©One Sweet Mess.