
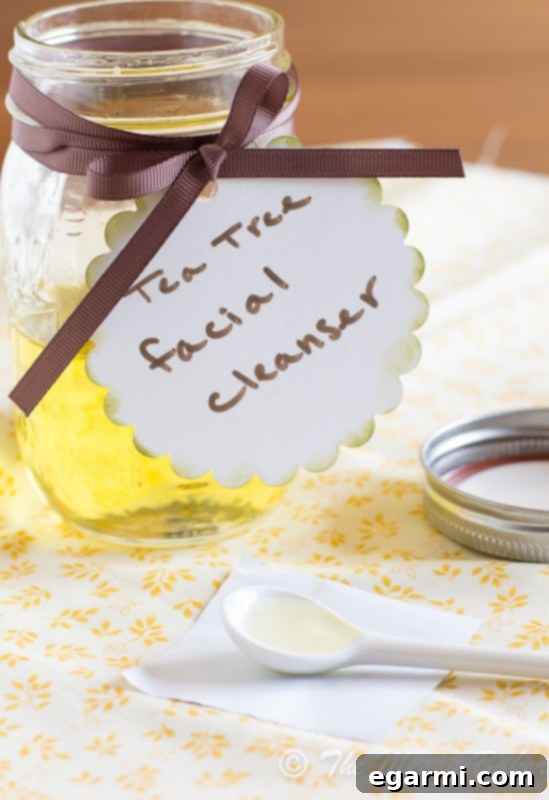
Welcome to a different kind of post! While my kitchen is usually bustling with culinary creations, today, we’re taking a delightful detour into the world of natural skincare. I know, it might feel a little unexpected, perhaps even a touch out of place for a food-focused space, but trust me, your skin is about to thank you. Prepare to discover the wonders of a homemade Tea Tree Oil Facial Cleanser that I’ve crafted, a true game-changer in the quest for clear, radiant skin.
My journey into the realm of chemical-free living began subtly a few weeks ago, sparked by a growing desire to embrace more natural products. Initially, the idea of ditching conventional, store-bought items felt daunting, a leap into the unknown. But once I experienced the raw, potent benefits of wholesome, natural ingredients, there was no turning back. This shift has been nothing short of transformative, not just for my skin, but for my entire outlook on self-care.
The catalyst for this beautiful transformation was a simple yet luxurious recipe: Homemaker Chic’s Citrus Body Sugar Scrub. I’d never encountered a scrub that felt so incredibly lush and refreshing. After just one use, my skin felt unbelievably silky smooth and deeply moisturized, completely eliminating the need for lotion post-shower. This homemade scrub easily surpasses any commercial product I’ve ever tried, and at a fraction of the cost! The recipe yielded enough to fill 6-8 oz jars, allowing me to keep two for myself and share the rest as thoughtful gifts. The unparalleled quality and significant savings were undeniable. It was Noelle’s ingenious scrub that truly opened my eyes and nudged me towards a chemical-free lifestyle. I thought, “If this scrub is so amazing, there must be countless other incredible homemade alternatives waiting to be discovered online.” And indeed, there were – and still are! I’ve since bid farewell to synthetic and commercial products, embracing a healthier, more natural approach to personal care.
My exploration into natural alternatives continued with Amber’s brilliant homemade deodorant recipe from Mama’s Blissful Bites. If you’re looking to “go green” and embrace a healthier lifestyle, Amber is an incredible resource; she truly embodies the spirit of natural living. Many people, including my dear mother, jokingly suggest I’m just one step away from becoming a full-fledged hippie. While I admire the philosophy, becoming a hippie might require me to trade my beloved, stylish leather pumps for canvas or, dare I say, hemp alternatives. And let’s be clear: this gal isn’t parting with her favorite shoes anytime soon! Nope, not going to happen.
A common question that frequently pops up in conversations is, “Does your homemade deodorant actually work?” My answer is always a resounding yes. I don’t detect any unpleasant odors myself, nor has anyone ever suggested otherwise. So, by all accounts, it works wonderfully. What’s more, being crafted with coconut oil, it not only keeps me fresh but also moisturizes and smooths my underarms. A win-win for natural self-care!
For years, acne has been a persistent and frustrating challenge in my life. Even at 29, I continue to battle breakouts, a relentless cycle that is often depressing, stressful, and, ironically, a breeding ground for more acne. After my success with the sugar scrub, I was determined to find a homemade solution to replace the countless facial cleansers that had consistently failed me. My acne often stems from hormonal irregularities, making it incredibly difficult to truly clear my skin of the annoying inflammation. It’s been a gigantic pain, really—one stubborn zit after another. I’ve tried virtually every product on the market: Proactiv, Obagi, SkinMedica, and the list goes on. I even resorted to oral medication prescribed by a dermatologist. Yet, every effort proved futile, not only failing to deliver results but also costing me a small fortune. My skin remained an ongoing source of frustration, fueling my determination to find a truly effective, natural remedy.
Then, I discovered the Oil Cleansing Method, or OCM. After extensive research, I stumbled upon articles championing the use of oil as a primary cleansing method. My initial reaction was disbelief: “What? I thought oil caused acne?” This common misconception couldn’t be further from the truth. Acne is primarily caused by bacteria, dirt, fungus, and even stress – but not by oil itself. In fact, healthy oils are essential for maintaining clear, balanced, and vibrant skin. Who knew! When you use harsh, commercial chemical cleansers, they strip your skin of its vital natural oils and essential nutrients. This deprivation often triggers your sebaceous glands to overcompensate, producing an excessive amount of sebum, which can lead to clogged pores and breakouts. In stark contrast, the Oil Cleansing Method works by dissolving impurities and makeup with beneficial oils, while simultaneously nourishing, healing, and balancing your skin’s natural oil production, leaving it healthier and happier.
I started incorporating the Oil Cleansing Method into my routine almost a week ago, and I am not exaggerating when I say I noticed a significant difference after the very first use. My skin felt impeccably clean and perfectly moisturized simultaneously, a balance I had never achieved with conventional products. It appeared remarkably smooth, boasting a natural, healthy glow. Could this truly be real? Could something so simple and natural be the answer I’d been searching for?
Oh yes, it absolutely could!
So, how exactly does the Oil Cleansing Method work its magic? At its core, OCM relies on a synergistic blend of natural oils, each carefully chosen for its unique healing and anti-inflammatory properties. This particular homemade cleanser is formulated with four powerhouse ingredients: castor oil, grape seed oil, jojoba oil, and tea tree essential oil, all working together to detoxify, soothe, and nourish your skin.
- Castor Oil: Renowned for its powerful anti-inflammatory, cleansing, and exceptional healing properties, castor oil is a star ingredient. A little goes a very long way, so investing in a high-quality, cold-pressed castor oil is highly recommended. It acts as a natural humectant, drawing moisture into the skin while providing a deep, purifying cleanse without stripping away essential hydration.
- Grape Seed Oil: This lightweight, non-comedogenic oil is a fantastic choice for acne-prone and sensitive skin. It’s incredibly high in vitamin E and potent antioxidants, offering excellent protection against environmental damage. Its natural astringent properties help to gently tighten pores and tone the skin, while also aiding in moisturizing and calming inflammation. Grape seed oil coats the skin beautifully without leaving a greasy residue or clogging pores, making it an ideal carrier oil for facial cleansers.
- Jojoba Oil: Often described as a liquid wax rather than an oil, jojoba oil is remarkably similar in chemical structure to the natural sebum produced by our own skin. This makes it incredibly effective at balancing oil production, tricking the skin into believing it has produced enough sebum, thus reducing overproduction. It moisturizes deeply without leaving any greasy feeling, helping to regulate skin’s natural balance and improve overall texture.
- Tea Tree Oil: A true hero in the fight against acne, tea tree essential oil possesses powerful antiseptic, anti-inflammatory, and antimicrobial properties. It’s an excellent natural remedy for combating infectious organisms, fungus, and bacterial skin irritations. Its ability to target and reduce acne-causing bacteria makes it an indispensable component of this homemade facial cleanser, helping to clear existing blemishes and prevent new ones from forming.
The best part is that all of these incredible, high-quality ingredients can be conveniently sourced online, often through retailers like Amazon, making it easy to embark on your own DIY skincare journey.
While I wholeheartedly endorse the Oil Cleansing Method, it’s important to remember that skincare is deeply personal, and what works wonders for one person might not be a perfect fit for another. Nothing in skincare is a universal guarantee. You truly have to experiment and discover what resonates best with your unique skin type and concerns. For me, however, OCM has been nothing short of a miracle worker. I am completely head-over-heels in love with the results and the newfound health of my skin.
If you’re intrigued and eager to delve deeper into the science and widespread benefits of this innovative approach, I highly recommend visiting The Oil Cleansing Method website. It’s an invaluable resource filled with comprehensive information that can further guide your natural skincare journey.
Beyond this fantastic cleanser, embracing a holistic, natural skincare approach offers a multitude of benefits that extend far beyond just clearer skin. By minimizing your exposure to synthetic chemicals and artificial fragrances found in conventional products, you’re not only being kinder to your skin but also to your overall health and the environment. This lifestyle shift encourages a deeper connection with nature’s powerful offerings, promoting balance and well-being from the inside out. Consider exploring other DIY recipes for toners, masks, or even simple moisturizers using ingredients like aloe vera, honey, or essential oils. The possibilities are endless when you start looking for natural solutions, empowering you to create a personalized skincare regimen that truly nurtures your skin without the harsh chemicals.
Now, for a few necessary, albeit less exciting, blog chores to keep us connected. As many of you might already know, Google Reader sadly departed the digital world on July 1st. It was truly unfortunate, as I adored Google Reader and relied on it heavily. However, I’m thrilled to share that you can now seamlessly follow my blog on Bloglovin’. I promise it’s just as delightful and user-friendly as Google Reader was, offering a beautiful way to keep up with your favorite blogs. I understand that change can be challenging, but in this digital landscape, we’re sometimes compelled to adapt!
Additionally, for those of you who follow me on Facebook and wish to ensure you receive all of my status updates and new posts, there’s a small adjustment you might need to make. Facebook’s algorithm changes mean they increasingly want creators to pay to ensure all posts reach all followers. As I’m not keen on paying to share my content with my dedicated readers, there’s a simple trick you can implement on your end to guarantee you see every single post and blog update. For a clear, easy-to-follow guide, please refer to this excellent tutorial by the ever-so-lovely Stephanie over at Eat. Drink. Love. She explains everything you need to know in a straightforward, two-step process – nothing complicated at all. Why Facebook chooses to complicate things, we may never fully understand, but at least there’s a workaround for staying in the loop!
- 1/4 cup castor oil (ensure it’s cold-pressed and high-quality for best results)
- 1/2 cup grape seed oil (a light, non-comedogenic option)
- 1/4 cup jojoba oil (mimics skin’s natural sebum for balance)
- 15 drops pure tea tree essential oil (for its powerful antiseptic properties)
- In a meticulously clean bowl, combine all four ingredients. Whisk thoroughly until the oils are well blended and homogenous.
- Carefully transfer your newly mixed cleanser into a clean glass jar with an airtight lid. A mason jar works perfectly for storage, keeping your cleanser fresh and potent.
- Begin by wetting your fingertips with a small amount of the oil blend. Gently massage the oil into your dry or slightly damp skin using circular motions for approximately one minute, ensuring you extend the massage to your neck region. Remember, the goal is a gentle massage, not vigorous scrubbing, allowing the oils to dissolve impurities.
- Next, wet a clean washcloth with hot water – as hot as you can comfortably tolerate without burning your skin. Wring out the excess water and place the warm, steamy cloth over your entire face. Allow the steam to open your pores and help the oils penetrate and cleanse deeply until the cloth cools. For an enhanced spa-like experience and deeper cleansing, repeat this steaming process once more.
- After steaming, rinse the washcloth thoroughly with warm water. Using the clean, damp cloth, gently wipe away the oil and dissolved impurities from your face.
- Finally, pat your face dry with a separate, clean, soft towel. Your skin should feel clean, soft, and beautifully moisturized, without any greasy residue.
- I typically use this cleansing method once a day, preferably in the evening to remove the day’s accumulated dirt and makeup. Using it too frequently, especially if you have sensitive skin, could potentially lead to irritation or excessive dryness. In the mornings, I opt for a simple rinse with water and a clean washcloth to refresh my skin without over-cleansing.
- If you have particularly sensitive skin, you might consider reducing the amount of castor oil, which is potent, or increasing the proportions of the gentler grape seed and jojoba oils until you find the perfect balance for your skin.
- This versatile blend can also double as an excellent eye makeup remover! Simply eliminate the tea tree oil from the recipe, and you have a gentle, nourishing oil blend that effortlessly dissolves stubborn eye makeup.
In conclusion, my journey into homemade, chemical-free skincare, particularly with the Oil Cleansing Method and this amazing Tea Tree Oil Facial Cleanser, has been nothing short of revolutionary. It has not only transformed my skin, offering relief from persistent acne and providing a healthy, natural glow, but it has also instilled in me a deeper appreciation for the power of natural ingredients. I hope my experience encourages you to explore the benefits of DIY skincare and discover your own path to healthier, happier skin. Give it a try – your skin might just thank you for it!