
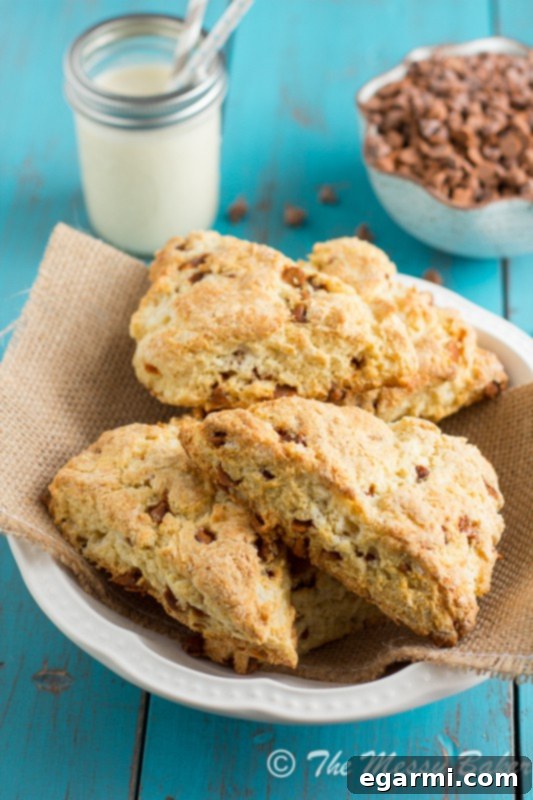
Discover the ultimate festive treat! Super tender, incredibly buttery, and subtly sweet scones infused with rich eggnog and delightful cinnamon chips.
Eggnog Cinnamon Chip Scones: Your New Holiday Baking Tradition
There’s something truly magical about the aroma of freshly baked goods filling your home, especially during the holiday season. Today, I’m thrilled to share a recipe that perfectly encapsulates that festive spirit: incredibly tender, buttery scones infused with the nostalgic flavor of eggnog and studded with sweet, spicy cinnamon chips. These aren’t just any scones; they are a delightful invitation to savor the most wonderful time of the year, one delicious bite at a time.
Imagine sinking your teeth into a scone that’s crispy on the outside, yet unbelievably soft and moist on the inside. Each mouthful delivers a delicate sweetness, the creamy warmth of eggnog, and a delightful pop of cinnamon. It’s a sophisticated twist on a classic, making it an ideal companion for your morning coffee, a special brunch, or a cozy afternoon tea. Get ready to impress your family and friends – or simply treat yourself – with these irresistible Eggnog Cinnamon Chip Scones!
The Secret to Scone Perfection: Embracing the Cold
Achieving those coveted flaky layers and a tender crumb in scones hinges on one crucial principle: keeping your ingredients, especially the butter, as cold as possible. Think of it as a little culinary magic! When cold butter hits a hot oven, the water within it quickly evaporates, creating steam pockets that lift the dough and form those beautiful, airy layers we all adore. If the butter is too warm, it melts into the dough before baking, resulting in a dense, cake-like texture rather than the desired light and flaky scone.
To ensure your scones are nothing short of spectacular, we’ll take a few simple yet effective steps. Begin by cubing your unsalted butter and placing it in the freezer for a few minutes. This quick chill ensures it’s perfectly firm when it’s time to incorporate it into your dry ingredients. Similarly, whisk together your eggnog, egg, and vanilla extract, then pop this liquid mixture into the refrigerator. Keeping these components cold right up until you need them is key to preventing the butter from softening too early and compromising the scone’s texture.
A Grandmother’s Wisdom: The Chilled Bowl Trick
My grandmother, a seasoned baker herself, once shared a brilliant trick with me when she was teaching me how to make her famous biscuits. It’s a game-changer for scones too! Before adding your dry ingredients, place your mixing bowl in the freezer for a few minutes to chill. A cold bowl acts as an extra layer of defense, ensuring that your precious butter remains firm and flaky, resisting the urge to melt into the flour prematurely. This simple step makes a remarkable difference in the final texture of your scones, guaranteeing that desirable light and airy crumb.
Once your dry ingredients are in the chilled bowl, it’s time to incorporate the cold butter. Using a pastry cutter, or even two forks if you don’t have one, work the butter into the flour mixture until it resembles coarse crumbs. This process is crucial for creating those pockets of butter that expand in the oven, leading to the signature flaky texture of a perfect scone. You want pea-sized pieces of butter distributed throughout, not fully blended in.
The texture at this stage is important: when you pinch a small amount of the mixture between your fingers, it should just barely stick together. This indicates a good balance of flour and butter, ready for the next step. Avoid overworking the butter into the flour; subtle, distinct pieces are what you’re aiming for.
Bringing it All Together: The Gentle Mix
Now, retrieve your chilled eggnog mixture from the refrigerator. With a wooden spoon or a rubber spatula, gently stir the wet ingredients into the dry mixture until they are *just* combined. The keyword here is “just.” You want to mix until no dry streaks of flour remain, but absolutely no longer. Overmixing develops the gluten in the flour, which leads to tough, dense scones – the opposite of the tender, melt-in-your-mouth experience we’re striving for. Once the dough barely comes together, gently fold in the cinnamon chips. Their sweet and spicy notes will infuse every bite, making these scones truly unforgettable.
Shaping Your Rustic Masterpieces
Once your dough is ready, transfer it onto a lightly floured surface. Resist the urge to knead it excessively. Instead, gather the dough and gently press it into a ball, then flatten it into a 3/4-inch thick round disk. You can start by pressing from the center outwards with your hands, or if you prefer, a rolling pin can help achieve an even thickness. Don’t worry about perfection here; scones have a wonderful rustic charm that makes them even more appealing.
Using a sharp knife or a pastry scraper, cut the round disk into 8 triangular pieces. Again, embrace the rustic look; slightly imperfect triangles add to their homemade appeal. Carefully transfer these triangular dough pieces to your prepared baking sheet, ensuring they are spaced about 3 inches apart to allow for proper air circulation and even baking.
Baking to Golden Perfection
With your oven preheated to a brisk 400 degrees F, slide your baking sheet of scones inside. The high heat is another secret to that desirable lift and golden-brown exterior. Bake them for approximately 18-20 minutes, or until they have puffed up beautifully and turned a lovely golden-brown color. Your kitchen will fill with the most inviting aroma of warm spices and sweet eggnog – a true sign of holiday cheer!
Customizing Your Scones: A Culinary Canvas
While these Eggnog Cinnamon Chip Scones are utterly perfect as written, this recipe also serves as a fantastic base for your own creative explorations. Feel free to make it your own by swapping out or adding your favorite scone fixings. Not a fan of eggnog? Replace it with buttermilk for a more classic tang, or even regular milk for a milder flavor. Want to add more texture and flavor? Stir in a handful of chopped pecans, walnuts, or almonds. Dried fruits like cranberries, cherries, or apricots would also be delicious, adding a chewiness and bright bursts of flavor.
Consider adding a touch of orange zest for a citrusy lift that beautifully complements the cinnamon, or a sprinkle of white chocolate chips for extra sweetness. The possibilities are endless! This versatility makes scones a wonderful recipe to experiment with, allowing you to create a unique treat every time you bake.
Serving Your Heavenly Scones
Once baked, allow your scones to cool slightly on the baking sheet before transferring them to a wire rack. They are truly at their peak when served warm. There’s nothing quite like the experience of cutting a warm scone in half, spreading a generous dollop of creamy butter on each side, and letting it melt into the tender crumb before taking that first blissful bite. The butter seeps into the scone, enhancing its richness and creating an even more indulgent experience.
For an extra touch of decadence, consider serving them with a dollop of clotted cream and your favorite jam, or even a simple homemade eggnog glaze (a mix of powdered sugar and a splash of eggnog). Paired with a steaming cup of coffee or tea, these Eggnog Cinnamon Chip Scones elevate any breakfast or brunch into a truly memorable occasion. They are perfect for holiday gatherings, a cozy weekend morning, or simply as a special treat to brighten your day.
These scones are truly extra special because they incorporate my absolute favorite holiday beverage. To enhance the existing eggnog flavor, I added some freshly grated nutmeg directly into the dough, which brings a warm, aromatic depth. The cinnamon chips then provide that wonderful “pop” of spicy sweetness and texture, ensuring every bite is a delightful symphony of holiday tastes.
The moist, buttery center of these scones is delicately sweet and pillowy soft, imbued with a subtle hint of eggnog and a delightful burst of cinnamon. They are far from ordinary; these Eggnog Cinnamon Chip Scones are a celebration of holiday flavors, promising to bring joy and warmth to your table. Don’t wait for a special occasion; make any day special with these incredibly delicious, homemade treats.

Eggnog Cinnamon Chip Scones
Super tender, extremely buttery, slightly sweet scones spiked with eggnog and cinnamon chips.
Yield: 8 scones
Total Time: 30 minutes
Prep Time: 10 minutes
Cook Time: 20 minutes
Ingredients:
2 1/4 cups all-purpose flour
1/4 cup granulated sugar
4 teaspoons baking powder
1/2 teaspoon baking soda
1/4 teaspoon freshly grated nutmeg
1/2 teaspoon kosher salt
1 stick (1/2 cup) unsalted butter, cut into 1/2-inch cubes and chilled
3/4 cup eggnog, chilled
1 large egg, cold
1/2 teaspoon vanilla extract
1/2 cup cinnamon chips
Directions:
1. Preheat your oven to 400 degrees F (200 degrees C). Line a baking sheet with a silicone mat or parchment paper for easy removal.
2. In a large, chilled mixing bowl, whisk together the all-purpose flour, granulated sugar, baking powder, baking soda, freshly grated nutmeg, and kosher salt until well combined.
3. In a separate measuring cup or small bowl, whisk together the chilled eggnog, cold egg, and vanilla extract. Place this mixture back in the refrigerator until you are ready to use it.
4. Add the cold, cubed butter to the dry ingredients in the large bowl. Using a pastry cutter (or two forks), cut the butter into the flour mixture until it resembles coarse crumbs. There should still be some pea-sized pieces of butter visible.
5. Using a wooden spoon or a rubber spatula, gently stir in the chilled eggnog mixture until the ingredients are just combined and no dry streaks of flour remain. Be careful not to overmix. Gently fold in the cinnamon chips until evenly distributed.
6. Transfer the dough onto a lightly floured surface. Gather the dough and gently press it into a ball. Then, pressing down from the center outwards, shape the dough into a 3/4-inch thick round disk. A rolling pin can be used for an even thickness if preferred.
7. Using a sharp knife or a pastry scraper, cut the dough disk into 8 triangular pieces. Don’t worry if they are not perfectly uniform; a rustic look is part of their charm.
8. Carefully transfer the triangular dough pieces to your prepared baking sheet, spacing the scones approximately 3 inches apart to allow them to bake evenly.
9. Bake for 18-20 minutes, or until the scones are puffed up, golden brown in color, and cooked through. The internal temperature should reach about 200-205°F (93-96°C).
10. Remove from the oven and let cool slightly on the baking sheet before transferring to a wire rack. Serve warm with butter, clotted cream, or your favorite jam for an exquisite treat.
All images and text ©One Sweet Mess.